by Evelyn Gyuris
Published by Self Published
I received this product for free in exchange for an honest review. This does not affect my opinion of the product or the content of my review.
If you are looking for a practical and fun coloring project have a look at applying some of your colored pencils to fabric. You can create a personal look for your home in no time and have a lot of fun at the same time.
This post contains affiliate links you can use to purchase the product. If you buy a book using that link, I will receive a small commission. This does not affect the price that you pay. Your support is very much appreciated x
Cushion Cover Review from Evelyn Illustrations Video
I hope you enjoyed the review of the hand made cushion cover with colorable art on it from Evelyn Illustrations and the tutorial on fabric painting with inktense pencils.
Cushion Cover Review from Evelyn Illustrations
Evelyn offers a range of cushion cover designs that you can choose including mandala, hearts, feathers and festive cushions. Evelyn actually hand sews her cushion covers and they are then printed with one of her original designs. The cushions measure 40 cm x 40 cm (16 in x 16 in).
The cushion covers are made from cotton sateen and feature a hidden zipper.
The actual cushion insert is sold separately from the cushion.

Colorable Cushion Cover
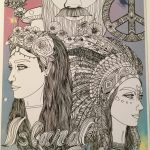
Evelyn from Evelyn Illustrations kindly sent me a cushion to color in. As most readers will know I love things that you can color and that are also practical and have a purpose.
I used to do a lot of fabric painting when I was a child and I was really looking forward to coloring the cushion.
Now, of course, I could have just used fabric paints but I really wanted to use my Inktense pencils and see what they looked like 🙂
Coloring A Fabric Cushion With Inktense Pencils
After conducting a lot of research online, I was unable to find a tutorial on using Inktense on fabric. There were many tutorials for using these pencils and the inktense blocks on silk but not on fabric. All of the tutorials I seen related to creating a free flowing pattern and not trying to stay within an outline.
I am very stubborn by nature, before you ask I’m an Aries 🙂 so rather than give up I decided to start experimenting.
Hubby’s old shirts became my testing playground. What I learnt from these experiments was that you can of course use Inktense on any fabric and it sets once it is activated. The danger is missing a little inktense and not activating it properly. That means it will get activated when it hits water ….like your washing machine 🙂
The major issue that I had with the Inktense is trying to stop it bleeding outside the lines of the design on the fabric.
I purchased some washable glue and created a border around the outline with the glue. My idea was that the glue would form a barrier stopping Inktense flowing over the line. My colored version of a wall 🙂 Once the cushion was colored then it would wash out in water and we would be left with a perfectly colored design. In all my experiments this worked very well.
My mistakes
One of my biggest mistakes with this project was not using a piece of the same material as the fabric cushion. My experiment results were completely skewed because of the different fabric. Sateen like silk absorbs the Inktense pencils and starts a slow and gradual bleed through the thin weave of the fabric. Sadly, you look at the cushion feeling quite chuffed with yourself that everything has stayed in the lines and then like the tide coming in, it slowly bleeds over the areas already covered in glue 🙁
The glue that I carefully painted on around the outline of the cushion did not hold as well as I had hoped, perhaps because of the heat that day in Australia 🙁 Some of the glue worked defending the design from bleeding but other parts of the glue failed.
In order to ensure that the Inktense could be controlled I used the poor man’s fabric medium with the Inktense pencil of aloe vera gel. After applying a layer of Inktense pencils I brushed over it with aloe vera gel being careful to activate all of the Inktense with the aloe vera gel. The gel provides more control than water, which is important when you want to stay within the lines. Had I been applying just a free flowing design on silk I would have used water.
Finished Result
Even though the Inktense did bleed and run a little bit and the finish is not as perfect as I had hoped I actually like the effect. I like the dreamy look that Inktense produces and how you can control the vibrancy of the color by adding more inktense either wet or on dry fabric.
If I was coloring this image again, I would ensure that I didn’t color as close to the lines as I did this time, and would keep well away to allow for the gradual penetration of color.
One of the things that I found when the bleeding started was how useful Inktense pencils are. Picking up my white Inktense pencils I colored over any dried areas where it had bled on the design. As Inktense stains it was useful in covering up some of the bleeding that was made.
My biggest shock was that the Sharpie markers for fabric I purchased bled more than the Inktense! Again, I like the effect that it created but I was not prepared for how much they bled on the fabric. The sharpies need to be heat set with an iron to ensure that the color is permanent, otherwise it will run when you wash the cushion.
Continuing to Experiment With Inktense
As I like experiments I have continued to play with my cushion cover until I can come up with a perfect solution for me and the Inktense pencils. I had purposely left the hair of the girl uncolored so after chatting with my local art shop, we felt that a barrier of candle wax was needed rather than the glue, which did not hold consistently and all over the design.
I colored a section of her hair with Inktense after applying a layer of warm candle wax around the design and voila ….. other than my over applying the inktense the wax formed a good barrier (my application needs more restraint).

You can see the blobs of wax that I applied on the picture (I over applied the Inktense) but note where the wax is applied on the right near the feather and at the top of the hair
I removed the wax barrier with a warm iron by ironing over the cushion that had a sheet of baking paper on top of it.

As you can see when I removed the wax the areas that I had applied it to were not colored by the Inktense (any Inktense out of the lines was my initial sloppy application).
In conclusion, using the candle wax was the most effective barrier (I need to put my glasses on when applying Inktense).
I am still looking at other ways to retain the outline of the design without having to melt a candle and am waiting for a new product to arrive so I can play mad scientist with it!
Wrap Up – Quick Summary
When you use your Inktense pencils or blocks on fabric make sure you carry out some tests first, preferably with the same type of fabric.
Do not color to the edge of the outline but stop well before to allow the color to seep to the edge.
Try and use a barrier around the outline if you wish to protect the design by either washable glue or candle wax. The candle wax was most effective in my experiments. Please carry out your own experiments first on scrap material, as the weather conditions in Australia would affect drying time and the “wetness” of the mediums.
A fabric medium gives you more control over the application of the colored Inktense but a household product like Aloe Vera gel can work just as well. As it is very hot in Australia when I was filming, I used half Aloe Vera and half water (on reflection if I had used less water I may have been able to control the seepage more)
A white Inktense pencil is useful in covering up a small oops …larger areas will need a different approach
Remember to set the fabric product that you used – Inktense sets with water activation (or wetness like aloe vera) and sharpie fabric markers set with heat (read the instructions on the pack).
Try not to be too precise and enjoy the organic and vibrant look of the Inktense without becoming too bogged down in the preciseness of the finished result
Where to buy the cushion cover designed by Evelyn Illustrations
Evelyn Gyurelis from Evelyn Illustrations has a range of home decor and coloring products for sale at her shop. All of Evelyn’s work is hand made and hand drawn with <3. Visit Evelyn’s shop here
Happy coloring x
Lea


Leave a Comment